Universal PLS6.150D 150W Laser Engraver
 | |
| Owner/Loaner | PS:One |
|---|---|
| Serial Number | PLS6150DXX082911106339 |
| Make/Model | PLS6.150D |
| Arrival Date | August 2017 |
| Usability | yes |
| Contact | Lasers Area Host |
| Where | CNC Shop |
| Authorization Needed | yes |
| Hackable | no |
| Estimated Value | $17,000 |
| Host Area | Lasers |
Status
CURRENT UPDATES
* CLICK TO VIEW CURRENT STATUS OF ALL LASER SYSTEMS *
OLD NEWS
- 6/27/2019 Universal was repaired by Scientific Spectrum Midwest to full functionality. Need to fix air supply before the Universal is put back into service. See required parts needed Media:Air_Assist_Parts_Assembly.doc See Media:2_Table_Calibration_Platform_Lasers.pdf and Media:5_Cleaning_and_Maintenance.pdf for maintenance. If you need to get familiar with the universal, please checkout out Media:6_Keep_these_thoughts_in_mind_when_creating_a_drawing.pdf and Media:7_Laser_procedure.pdf
- 5/19/2019 Universal laser is not working. Ask the Area Host at lasers@pumpingstationone.org for more information.
- 04/1/2019 Back Up And running, Check Google Group for more details
- 02/18/2019 Out of Service: Assembly out for repair; no ETA on repairs; check Google Group for more details and updates.
- 12/20/2018 Universal 15OW is running on the top tube only (so, effectively 75W), and even so is cutting weakly.
- (12/2/2017) Hooked up to ex-Epilog air and exhaust connection. The air assist works but does leak using the quick connect fitting, the other fitting requires a 1/2" (I think) screw fitting which will create a better seal. The x-axis is off by ~3/8", y is off too but didn't measure.
Current status: connected to exhaust and compressed air using the ones designed for the Epilog while the Epilog is out of service. Figuring out authorizations. If you want to be part of that, get in touch with CNC Area Host or folks on the Danger Committee.
- (2017/05/20) Wiki page created
- (August 2017) Laser donated from SAIC - thank you, Anna Yu!
Authorization: How to Get Authorized
Authorization for the laser is not virtual, meaning you must complete this Canvas Course and then fill out this Sign Up Form.
The laser volunteers will be notified automatically after the form is submitted. You will then be notified when the next authorization is scheduled. (approx. every 2 weeks at the authorizers discretion)
If no authorizations are scheduled in the next 30 days, then post to #lasers slack channel; look for a recent thread about laser authorizations and post there.
Please review the wiki and the reference materials before attending an authorization.
If you have other questions after the reviewing the wiki, Please reach out on #lasers slack channel, respond to a recent authorization thread, and if you still need help then try a direct message to the authorizers at laser-auths@pumpingstationone.org .
Usage Policy
The laser cutter is easily one of the most used machines at PS1. Due to this demand we request the cooperation of all members to share the laser cutter and associated computer. First and foremost, the practice "being excellent" should be observed at all times; respect yourself, other members, and the equipment. This is a usage policy so that everyone can use the laser:
- Any user not actively test cutting or cutting will cede the computer and laser to the next person waiting in line, as soon as that waiting user notifies the current computer user. If you are still designing your file, please do so on another computer. Artastic (another PC upstairs) in the Crafts Area also has a copy of Adobe Illustrator.
- If someone is waiting in line to use the laser, no active test cut or cut series shall be longer than 1 hour. No jobs will be allowed to start that overrun the 1 hour time limit when a new user is waiting.
- In the case that your last cut is longer than the 1 hour time limit, and a waiting user presents themselves after the cut has started, the cut job shall be allowed to finish and the waiting user will be allowed to set up their file in their own user account, during the cutting period.
- Continuous cutting shall not exceed 3 consecutive hours without a half hour break for the laser to cool. If a new user arrives before or during the cooling period the current user shall cede the laser to the next user, and the next user will wait for the cooling period to finish and the cooling period shall not count towards the 1 hours limit should another user present themselves.
- Waiting users shall notify the current user verbally that they are waiting and where they will be waiting until it is their turn. If multiple users are waiting, the next waiting user must start their test cutting or cut job within 10 minutes of being notified of a laser opening. The current user will keep a record of who is waiting, where they will be, and notify subsequent users of the status of the queue. The current user will find the next waiting user and verbally inform them that the laser is available.
Additional Ways to be Excellent
- Have your artwork and your materials prepared and ready ahead of time. Artastic (another PC upstairs) in the Crafts Area has a copy of Adobe Illustrator.
- Allow people to start setting up their job after your last cut starts running. If you're concerned about a last minute adjustment, you can use Window's switch user feature to keep your file available.
- If there is someone waiting, get their phone number to text them, if possible. Texting allows you to give them a heads up so they can start setting up their job without you leaving the laser are. (Leaving the laser running unattended is against the rules.) It also spares you from having to physically track down the other user.
Table Saw Note!
Items that have been cut on the laser cutter have the potential to set off the SawStop table saw safety brake. This will make the saw unusable until the SawStop cartridge is replaced, which costs ~ $75! It typically happens if there is an excess of carbon char on the edges.
Before use the SawStop to cut anything from the laser cutter please test the piece on the edge of the blade when the blade is not turning and see if it activates a red light on the display. How do you do this.
- Turn on the main power switch to the Sawstop.
- DO NOT TURN ON THE BLADE. THE BLADE must not be moving.
- Check and see if the green light is on the front of the saw.
- Slide the piece you want to cut up to and contact the blade.
- Look at the lights on the front of the SawStop. If it is green you should be OK to proceed. If its red. DO NOT CUT. IT WILL TRIGGER THE BRAKE.
You can try to sand off the char and repeat steps 1-5 or use another method to cut these pieces.
References and Manuals
- Quick Start Guide
- Illustrator and Photoshop basic setup and operation
- Universal Laser PLS6.150D User Manual
- Materials Settings Reference
- Media:6_Keep_these_thoughts_in_mind_when_creating_a_drawing.pdf
- Media:7_Laser_procedure.pdf - .001pt line weight doesn't preview well, but its there.
About
The Universal Laser Systems PLS6.150D is a free-standing platform with a materials processing envelope of 32" x 18" x 9" or 5,184 in³ (813 x 457 x 229 mm or 84,950 cm³) that supports dual lasers. As a dual laser platform, the PLS6.150 can support up to two 10.6µ CO2 lasers with a power range of 10 watts to 150 watts. Additionally, it can support a single 9.3µ CO2 of 30, 50 or 75 watts. (if a 9.3u CO2 laser is installed, only one 10.6 CO2 of up to 75 watts may be installed at the same time.)
This one has two 75Wlasers totaling 150W of power.
The unit was donated from SAIC.
Machine Dimensions are 45" x 35" x 40".
Procedures
Setting Up Your Computer
TIPS:
- Black is always set as a raster. For all other colors, the stroke weight must be 0.1pts or less to be recognized as a vector.
- White is one of the colors in the template, but acts as a mask unless you tell it otherwise.
- Click "Apply" every time you do anything in the print settings, or it won't save.
Air assist
- Turn on the air assist by flipping the switch dangling from the board behind the laser.
- Air assist is used for vector cutting to have nice traces and avoid your material to burn. However some people like to have it disabled for raster jobs.
- Turn air assist off when you've finished and you don't need it while doing your settings.
Water Trap
- Check the WATER TRAP adjacent to the regulator for accumulated water from time to time. Place a container (and maybe some paper towels) under the regulator and vent accumulated water from the bottom using the small petcock. If too much water accumulates in the regulator, it may flow through the air hose and into the machine, spraying onto the bed/material.
Exhaust
- Turn on the Exhaust Fan by pressing the Green Button on the Pillar opposite the 3D printers.
- It is always good practice to open the Make-up Air Window to allow fresh air to circulate while running a job.
Powering On Machine
- Turn on the Power Switch and let the machine complete the entire boot up cycle, approximately 1-2 minutes.
Running your job
- Use the printer driver and Universal Control Panel (UCP) to send data to the laser.
- The printer driver is discussed from page 39-57 of the manual, and on page 58-62, the UCP is explained.
- https://wiki.pumpingstationone.org/images/Universal_PLS6.150D_user_guide.pdf
- ALLOW AT LEAST 30 SECONDS TO ELAPSE BEFORE LIFTING THE LID AFTER A JOB.
Powering Off Machine
- Allow the Exhaust & Air Assist to run for approximately 10-15 min. after completing a job. (DO NOT CYCLE THE EXHAUST SYSTEM RAPIDLY).
- Turn off the Exhaust & Air Assist FIRST
- Power down the machine
- Clean up you materials, throw away scrap, make sure the focusing tool is replaced
Using Inkscape
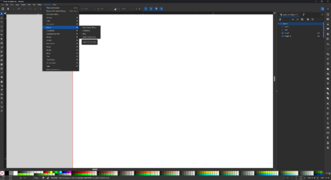
Inkscape has already been set up for use with the laser on this computer. You can find a template here.
As of writing this, it seems you cannot print vectors and rasters simultaneously (subject to change). However, there is an easy workaround:
To engrave the raster elements, simply print:
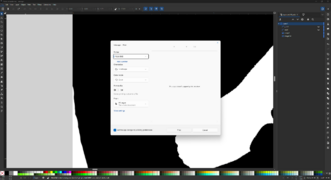
To engrave the vector elements, do a "Win32 Vector Print":
In both scenarios, the files should show up in laser control panel. Happy printing!
Laser Materials
Acrylic and wood are safe materials to cut on the laser.
Many materials are unsafe, see https://wiki.pumpingstationone.org/Laser_Materials for a list.
NEVER CUT FOAM - IT IS THE #1 CAUSE OF DAMAGING LASER CUTTERS. Even if it seems safe, the foam WILL catch fire and damage the equipment before you can stop it.
A starting point for settings using the laser is here - Materials Settings Reference
Maintenance
Please note that ONLY authorized maintainers are allowed to perform regular maintenance.
Maintenance Files
- Do Not Throw Way Old Lens or Mirror Frames for the Universal. They can be repurposed with 3rd Party lens/mirrors for 1/5 the cost and the same performance.
- Replacement mirrors for the universal are very expensive because they semi-circular. However, they are simply a 25mm radius mirror that can be grounded down. The files for 3D printing the guides are here[1]. Protect the mirrored surface when grinding, then super glue the new mirror to available mounting frames.
Bugs/Quirks
- UCP stopped showing previews for and cutting color layers that were marked as "VECT" despite having the correct colors and line weights. This was tested with Adobe Illustrator and Acrobat. Files that had been previously created and were in the file cache still worked though. What seems to have fixed the issue was selecting a material from the material library in Adobe Illustrator's advanced print dialog and printing the project with those settings first - "VECT" worked. From there you can go back into the print dialog and start selecting your own layers to output as "VECT".
- lens diameter 19.05mm x 50.8mmFD
List of Currently Authorized Maintainers
| Qualified Member | Trained By | Date |
|---|---|---|
| [Maintainer] | Trained by... | Date trained... |
